![]() Customer and Agent submission panels are web forms that are submitted to create tickets or post data for processing. The primary difference between customer and agent submission forms is that only agent forms allow the user to assign questions to agents. Agent forms can also be included within the Custom Forms section of the left navigation panel for quick access by agents. Customer submit forms are displayed outside of the agent interface, such as within an iframe on your website or as a stand alone web page.
Customer and Agent submission panels are web forms that are submitted to create tickets or post data for processing. The primary difference between customer and agent submission forms is that only agent forms allow the user to assign questions to agents. Agent forms can also be included within the Custom Forms section of the left navigation panel for quick access by agents. Customer submit forms are displayed outside of the agent interface, such as within an iframe on your website or as a stand alone web page.
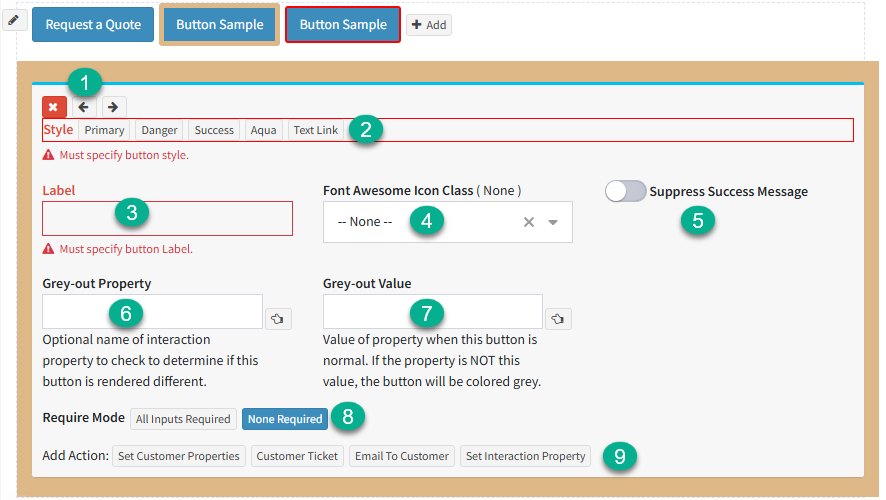
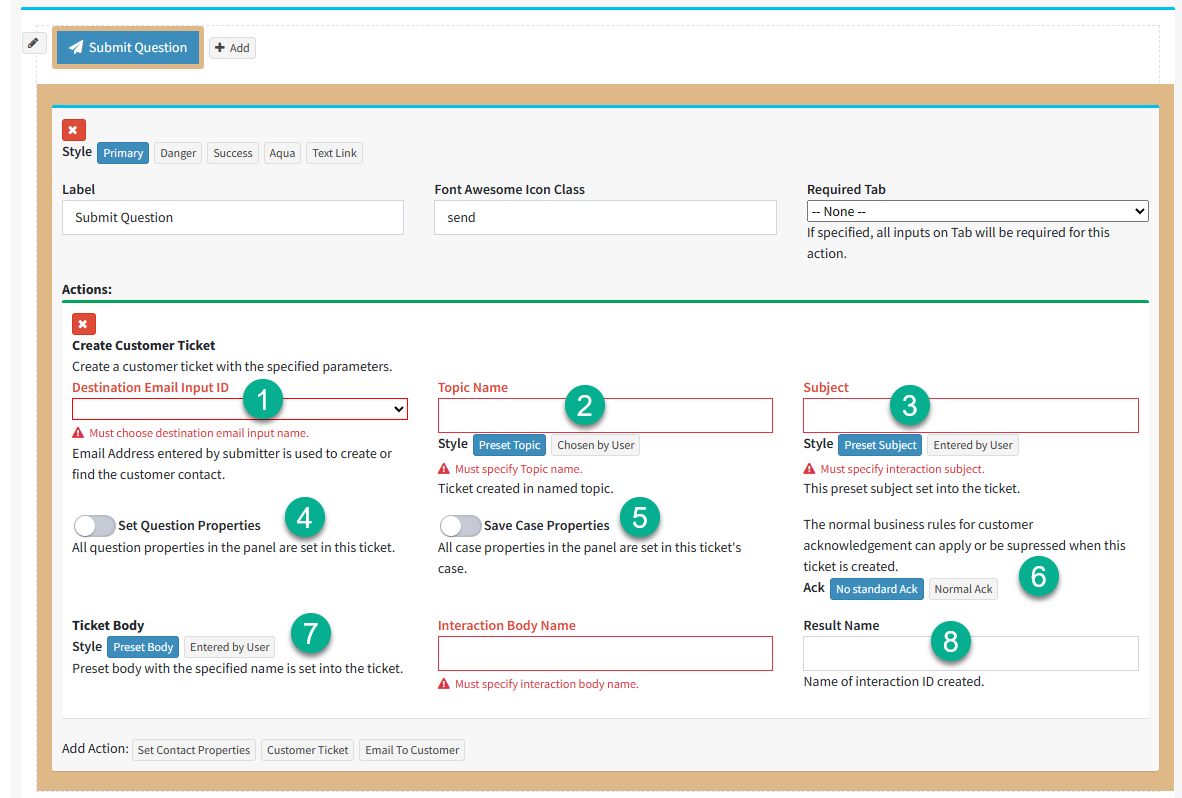
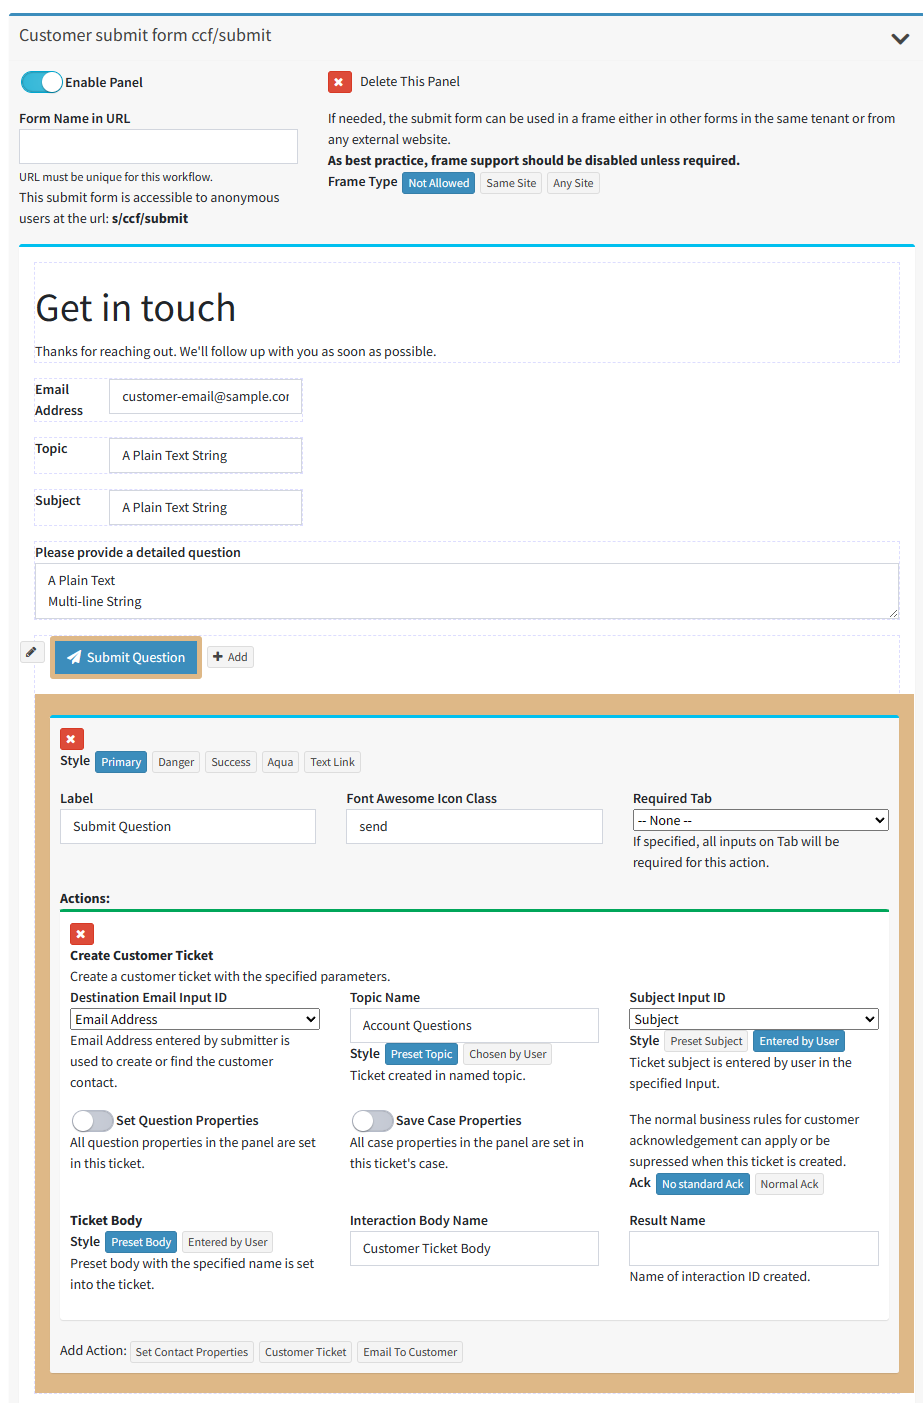
Submission forms have two primary sections: the form body and the form actions. The form body contains inputs for things like email address, subject line, and property values. The form actions are tied to buttons on the page. When the button is clicked, actions like create ticket are executed.
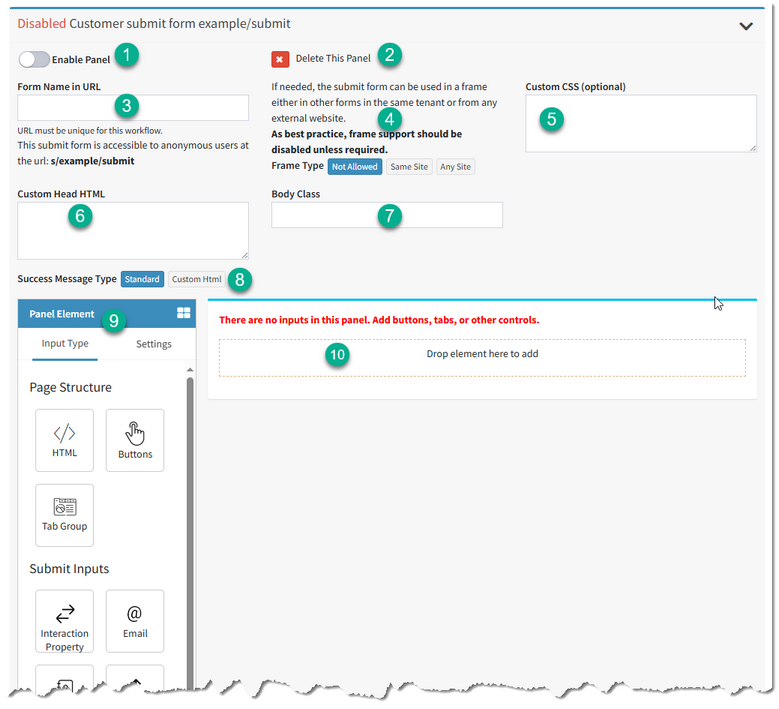
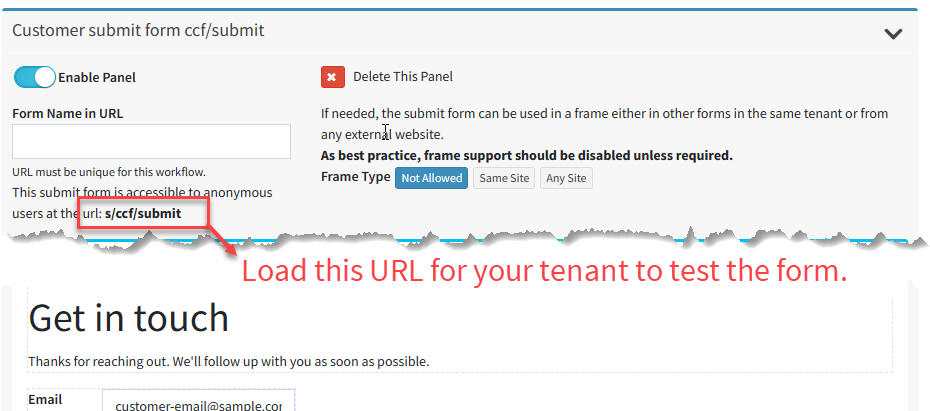
When you create a new Customer Submit Form, the following screen is shown.
# |
Element Name |
Description |
|---|---|---|
1 |
Enable Panel |
Your form will be live as soon as you enable the panel. |
2 |
Delete This Panel |
You can remove the panel from the workflow. Once it is deleted and the workflow is saved, it cannot be recovered. |
3 |
Form Name in URL |
This value becomes part of the URL that is used to load the form. Use a value that is short and descriptive. |
4 |
Frame Type |
It's common to embed your submit form into a web page, like your company website. To include a form into an iframe you must specifically allow it to be embedded. Without this setting, browsers will reject the iframe and present an error to the user trying to load it.
Not Allowed - the form will not load within an iframe. Same Site - you can only embed the form into a page that has the same domain as your form. This would only be used to embed your form into a customer portal or other page that has the same domain as your iService tenant. Any Site - use this setting to embed your form into a website with a different domain than your iService tenant. |
5 |
Custom CSS |
Add custom CSS to the head of the submit form to control the theme and style of the form. Enter the CSS without the Style tag. |
6 |
Custom Head HTML |
Add a custom block of HTML into the Head section of the web page. |
7 |
Body Class |
Modify the class styles for the Body of the form. |
8 |
Success Message Type |
When the form is submitted, and standard success message will be displayed. You can replace this with a custom success message by clicking Custom HTML. Then paste your custom HTML or use the rich text editor to create the page. After your custom HTML page is created, click the edit pencil to edit the document. |
9 |
Panel Elements |
Layout the interface by dragging elements from the Panel Elements picker onto a drop zone in the body of the panel. |
10 |
Panel Layout |
Drag your HTML, Inputs, and Buttons into this areas to create the layout for your page. |
To add an element to the panel, click the arrow for the location to create a drop zone. Then drag an element onto the drop zone to create it. This is illustrated below.
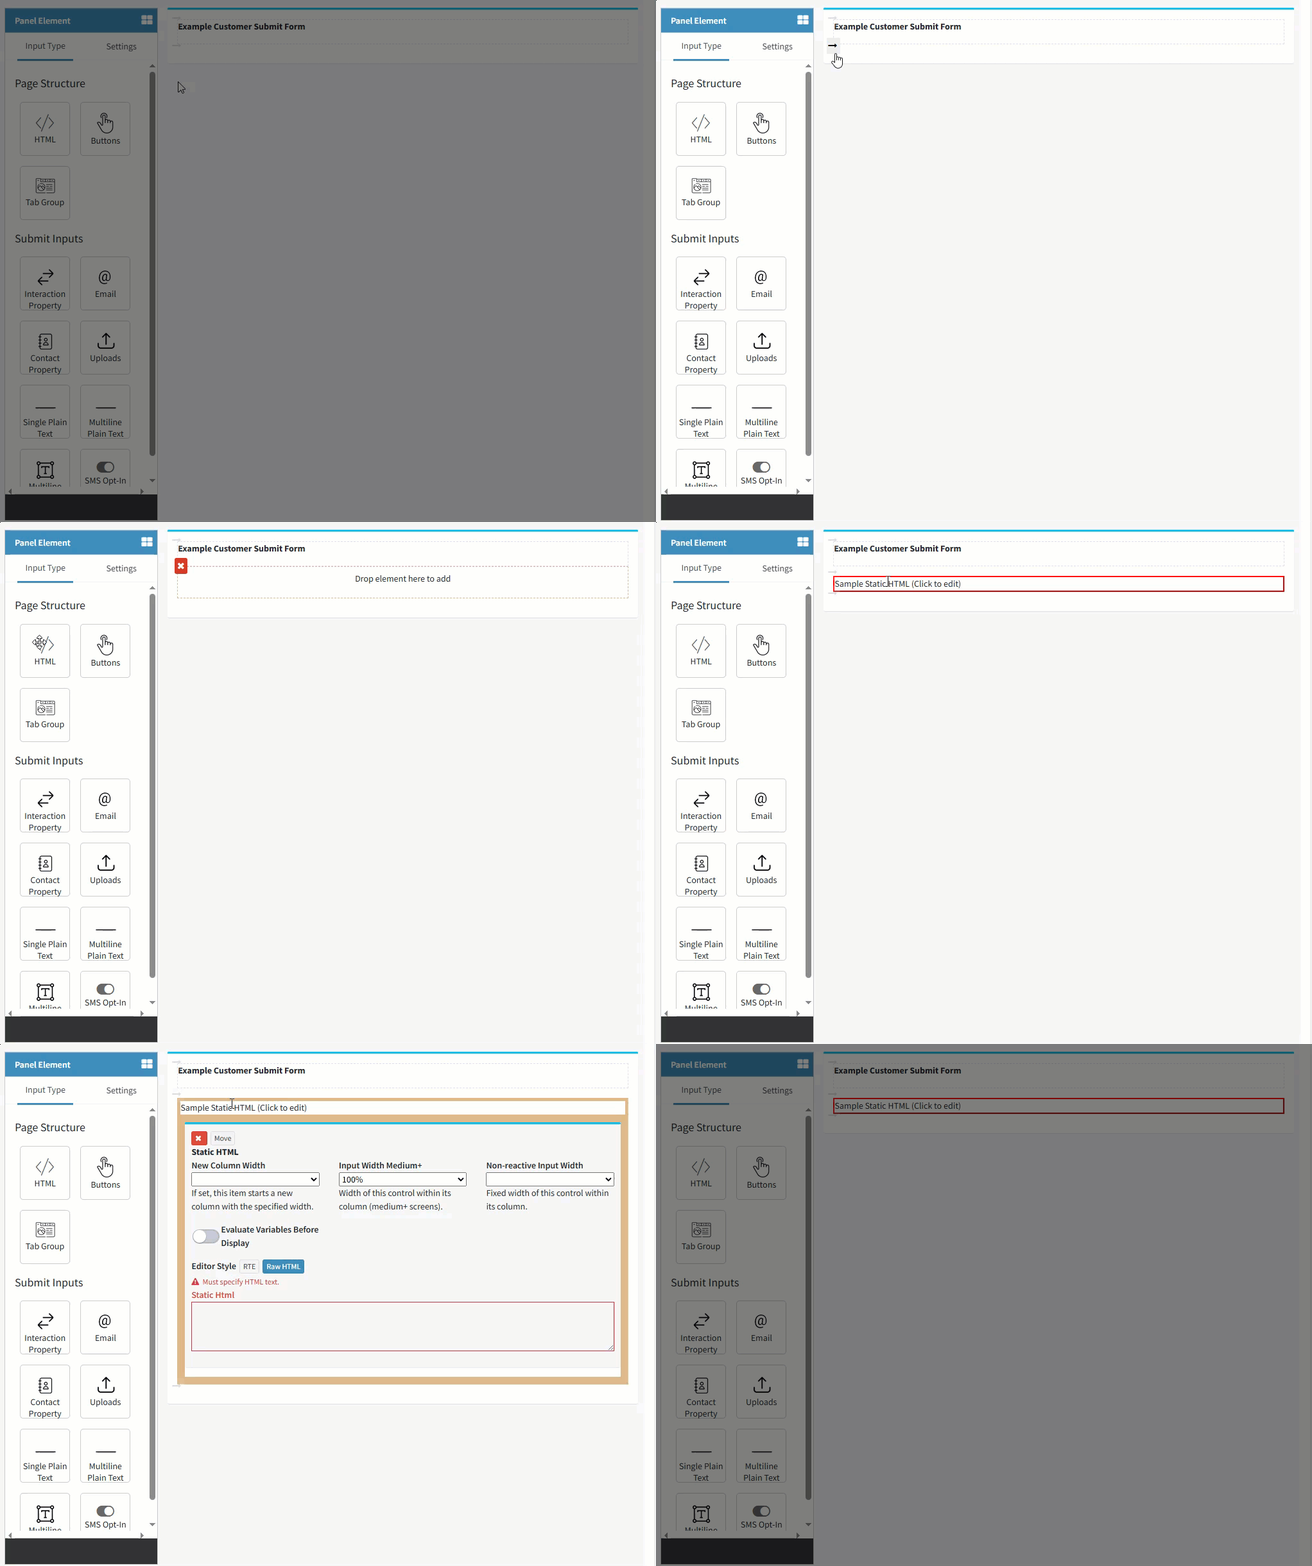
Dragging and dropping an element onto the form.
