 iService includes a no-code workflow builder that makes it easy to create custom submit forms and agent menus to match your internal processes. Workflows can include a submit form to capture details needed for your process, such as a request for a quote. They can also include custom answer menus for agents that are rendered based on the topic of the question, or a tag added to the interaction. These answer menus can simplify the agent interface by presenting custom buttons that trigger the exact action needed. Custom answer panels replace the standard answer panel that has buttons for Send, Resolve, Forward, Change Topic, etc.
Do you have a process that requires items to be approved? Submit the request through a workflow submit form, and then queue it for the users that are authorized to provide approval. When the ticket is opened, the user is presented a simple action menu with Approve and Reject buttons. These types of custom processes will make your agents more productive and greatly reduce errors. In fact, many users will be able to interact with your workflow with no or minimal training on the iService user interface.
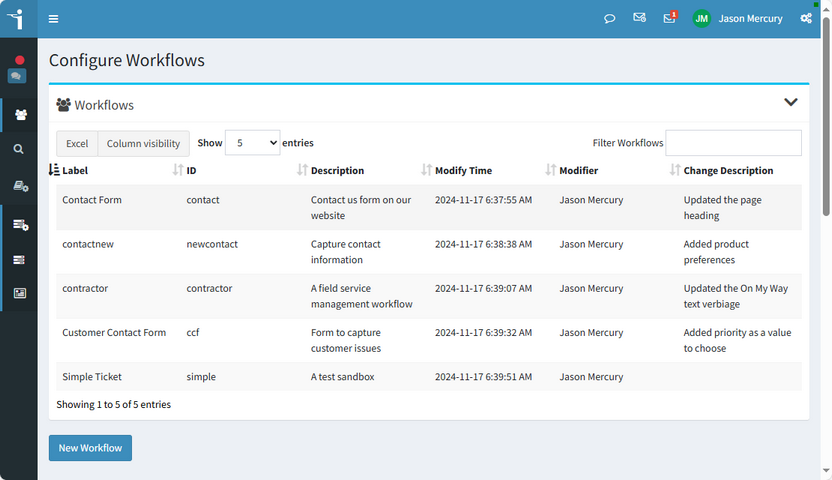
Similar to other settings pages, the workflow orchestrator provides a list of workflows that can be edited or deleted. When a workflow is deleted, the configuration is removed from your tenant database and all forms and custom answer panels will be removed. You cannot recover deleted workflows. The Workflows list includes details about the last update saved, including the time, agent, and description for the change.
Creating a New Workflow
To create a new workflow, click the New Workflow button. Then enter the details below and click Create.
# |
Element Name |
Description |
|---|---|---|
1 |
Workflow ID |
The ID entered becomes part of the URL used to access any submit forms created. You can only use lowercase letters in the ID, and the ID must be unique to all configurations within iService (including other configurations such as chat). |
2 |
Workflow Label |
The label is displayed in the Workflows List and should be descriptive. |
3 |
Paste Workflow |
You can import workflows by pasting them into this text box. All of the components will be automatically created, and you will use the Object Mapping page to set the values for things like topics, properties, and agent lists. |
Editing Workflows
The Workflows interface includes these components. Workflow configurations are designed to be reused, so the mapping to your tenant specific IDs for topics and properties is separate from the configuration. The mappings are set within the Segment Properties, Topics, and Agent Lists tables. These tabs allow you to associate the names used in your workflow with the IDs for topics, properties, and agents that are specific to your tenant configuration. This allows you to create a workflow for one iService Segment and then share it with other segments or tenants. Or, you can import a workflow from the One-to-One Service workflow library and use the mappings pages to link it to the proper tenant values.

# |
Component Name |
Description |
|---|---|---|
1 |
Basic Setup |
The Basic Setup tab defines the label displayed. |
2 |
Panels |
Your workflow will contain various panels for things like customer submit forms, agent submit forms, and custom answer panels for agents when interacting with questions in the workflow. These panels include the layout for all the user interfaces in your workflow. |
3 |
Templates |
Your workflow can include various notification messages sent to customers and agents. You define and configure those messages in the Templates tab. |
4 |
Data Files |
You can upload an Excel spreadsheet for use within the workflow. For example, upload a price list and use it within a price estimation workflow step. Create your file definition and upload your file in the Data Files tab. |
5 |
Segment Properties |
Your segment interaction and contact properties are selected in this tab. |
6 |
Workflow Properties |
Workflow Properties are defined directly within the workflow and do not require mapping to tenant values. |
7 |
Topics |
Use the Topics page to associate the names of topics used in your panel actions with the appropriate topics in your tenant. |
8 |
Agent Lists |
Use the Agent Lists page to define the lists of agents used within the agent pickers in your panels. |
9 |
Import / Export |
You can export or import individual components using this page. Use this to migrate single panels, complex property definitions, and message templates. |
10 |
Copy to Clipboard |
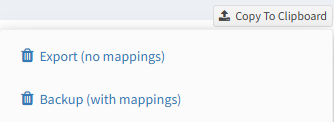
Use the Copy to Clipboard option to export an entire workflow configuration. You can then import the workflow directly into another tenant by pasting it into the Paste Workflow text box. There are two options for exporting: with mappings and without mappings. The mappings include the IDs for Segment Properties, Topics, and Agent Lists specific to the tenant. The no mappings option will export everything except for those three tabs. When importing into a different tenant that has different IDs for topics, segment properties, and agents use the no mappings version to avoid having elements mapped to the wrong item.
|
11 |
Workflow Label |
This is a friendly name that is used to identify your workflow in the workflows page. |
12 |
Description |
This is an optional field for describing the purpose of your workflow. |
13 |
Save Workflow |
Your changes are not saved if you navigate away from your workflow before clicking the save button. When you save your changes you can add a description of the changes you made. This value is overwritten with each save action. |


